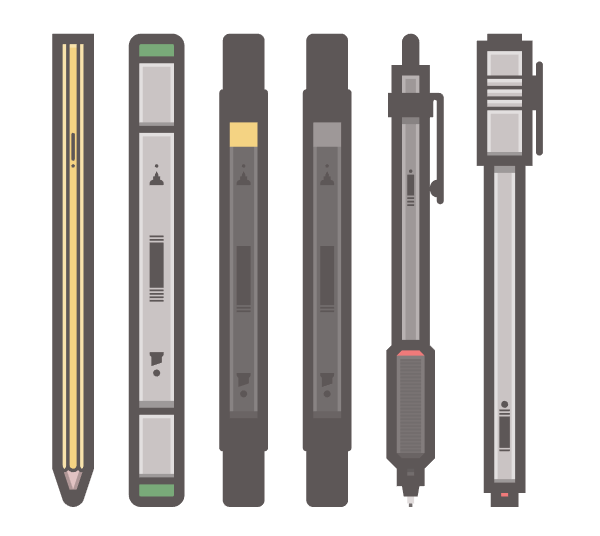
Hello fellow design enthusiasts, today I’m going to show you how to build your very own flat styled set of writing tools using the mighty Adobe Illustrator.
The process will rely on using basic shapes (rectangles and rounded rectangles), which we will adjust here and there using the powerful Direct Selection Tool. Without wasting any more time, power up Illustrator and let’s get starting.
Setting Up a New Document
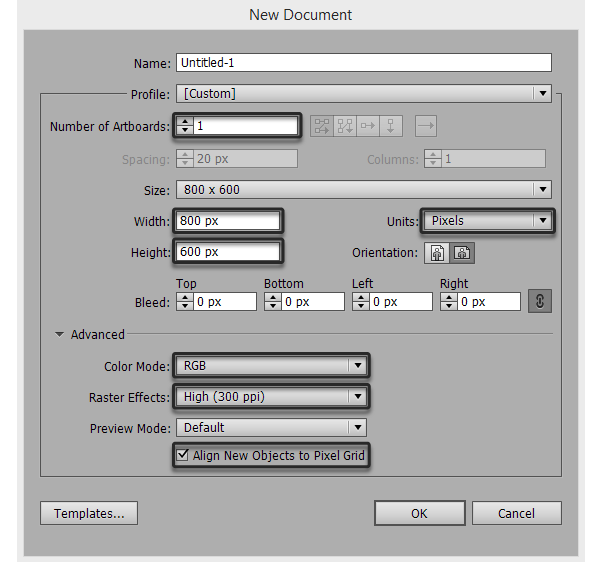
The first thing we need to make sure when we start designing anything is that we set up our document right. Go to File > New (ctrl + N) and create a new document with the following settings:
- Number of Arboards: 1
- Width: 800 px
- Height: 600 px
- Units: pixels
And from the Advanced tab:
- Color Mode: RGB
- Raster Effects: High (300 ppi)
- Align New Objects to Pixel Grid: checked
Structuring Our Artboard Using Layers
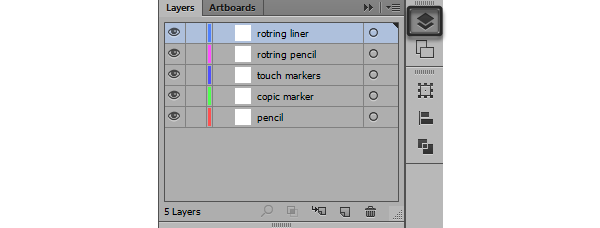
Once you have created the document, we need to set up some layers so that we can structure our illustration, enabling use to work on different sections without the fear of losing or moving parts along the way. Open up the Layers panel (F7) and create five layers, naming them as follows:
- pencil
- copic marker
- touch markers
- rotring pencil
- rotring liner
Adjusting Our Grid’s Settings
Because we want to make sure that everything on the Artboard ends up being pixel crisp, we need to adjust our Grid so that we can snap our elements as accurate as possible. Go to Edit > Preferences > Guides & Grid and tell Illustrator to:
- Gridline every: 1 px
- Subdivisions: 1
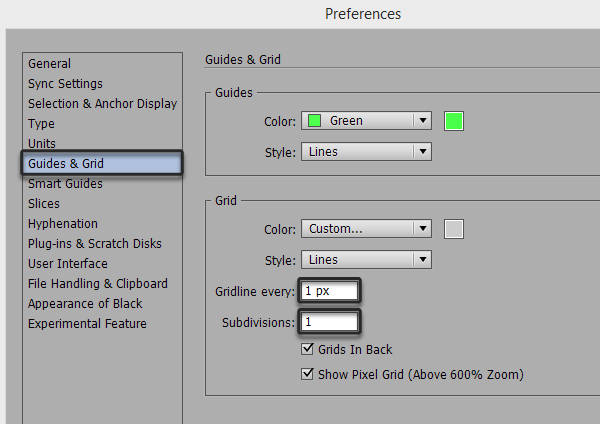
Then simply go to the View top menu and enable the Snap to Grid option and we’re good to go.
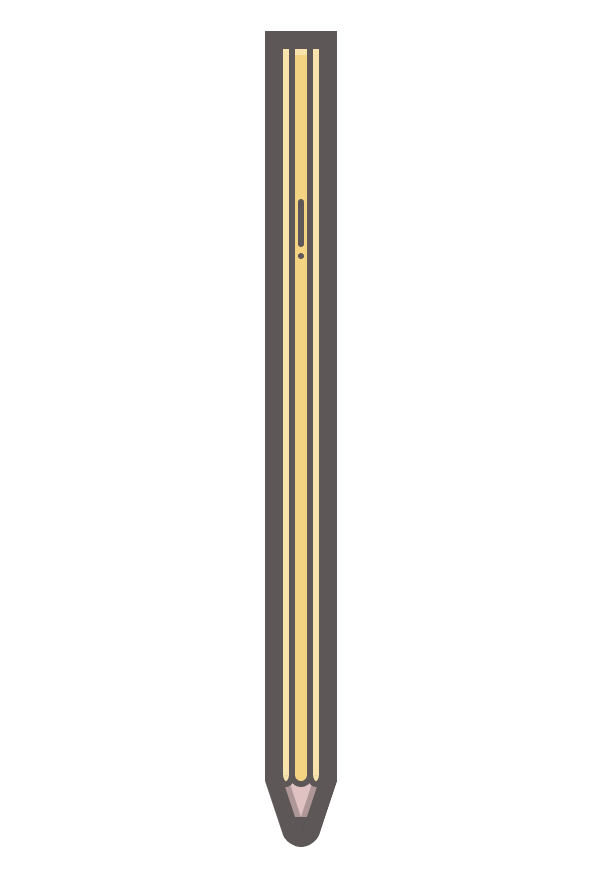
Creating the Pencil
Step 1
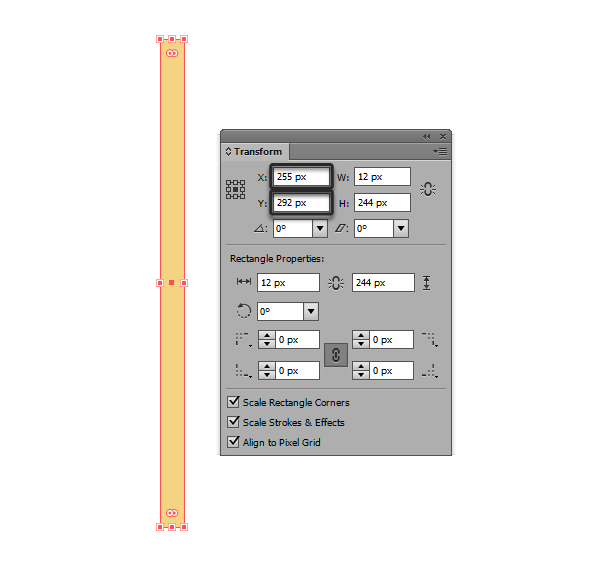
Make sure you’re on the pencil layer, and using the Rectangle Tool (M) create a 12 x 244 px shape, which we will color using #F4D484 and position on the Artboard using the Transform Panel (shift + F8):
- X: 255 px
- Y: 292 px
Step 2
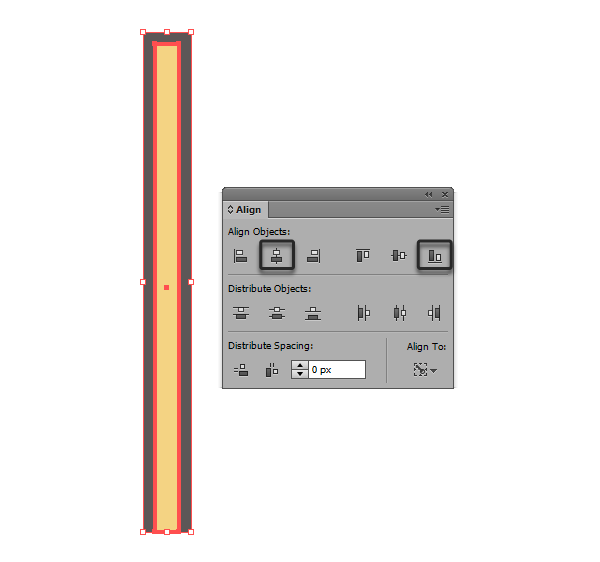
Create a slightly taller 24 x 250 px shape that will act as our pencil’s outline, and horizontal align it to the bottom of the previously created shape, making sure to color in a dark grey tint (#5D5656).
Step 3
Add a set of two 2 x 242 px delimiter lines to the interior of the pencil, making sure to center them and align them to the top section of it.

Step 4
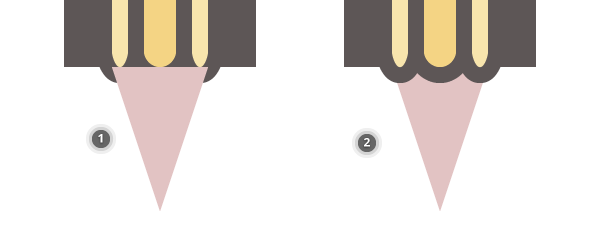
Next we need to take care of the pencil’s bottom section that has the three round parts that take form each time when you sharpen its tip.
First using the Ellipse Tool (L) create two smaller 2 x 4 px objects, and one slightly larger 4 x 4 px one that you will position right in-between the two. Distance them at 2 px from one another, and then duplicate all three of them (ctrl + C > ctrl + F).
Change the duplicates color to #5D5656 and then create outlines out of them by using the Effect > Path > Offset Path and entering 2 px in the Offset input box. As you can see we need to get rid of the top upper half, so select each element one by one, and using the Direct Selection Tool (A) remove the top anchor point, uniting the remaining ones using ctrl + J.

Step 5
Once you’ve done that, simply group all the elements using ctrl + G and position them right under the pencil’s inner delimiter lines.

Step 6
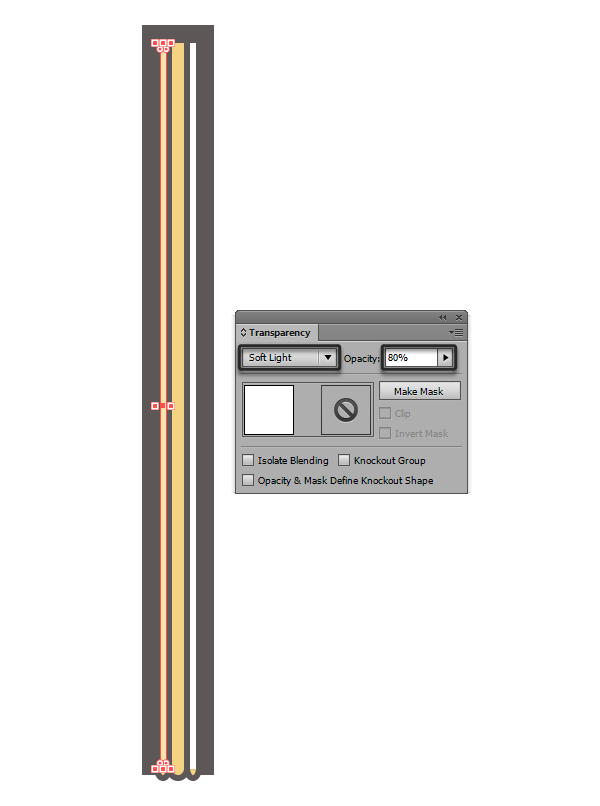
Once we have the rounded three segments positioned, we need to make sure that to add two white (#FFFFFF) 2 x 242 px rectangles on each side of the pencil’s yellow base shape, align them to the bottom side, and then change their Blending Mode to Soft Light and lower their Opacity to 80%.
Step 7
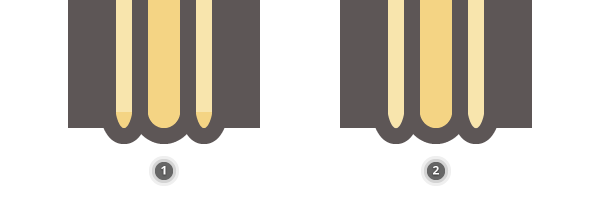
If you zoom in, you might notice that the side highlights are missing the round bottom sections. To change this, simply select the shapes we created at step 4 using the Direct Selection Tool (A) and then create a copy above them (ctrl + C > ctrl + F) making sure to set the Blending Mode and Opacity levels exactly as we did at step 6.
Step 8
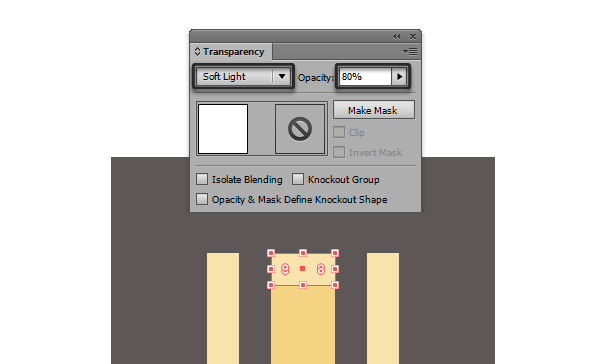
Position yourself onto the top section of the pencil, and add another 4 x 2 px rectangle which will act as our top highlight. Change its Blending Mode to Soft Light and lower its Opacity to 80%.
Step 9
Grab the Pen Tool (P) and create a bottom pointing triangle (#E2C3C3) with a width of 12 px and a height of 18 px. Once you’ve created the shape make sure to position it under the rest of the pencil’s elements by right clicking > Arrange > Send to Back.
Quick tip: You might want to enter Pixel Preview mode (alt + ctrl + Y) to have more accuracy on your tracing.
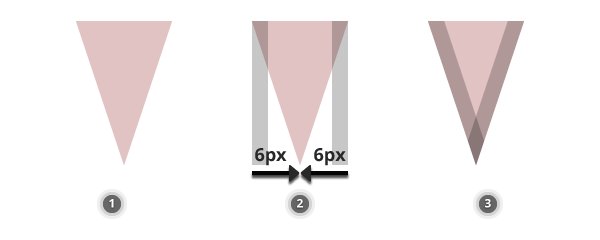
Step 10
Now, we need to add two side shadows to the pencil’s tip. Create a 2 x 18 px rectangle, left aligning it to the tip.. Using the Direct Selection Tool (A) select the bottom anchor points of of the shape and move them 6 px towards the right ( with the anchors selected > right click > Transform > Move and enter 6 px in the Horizontal field, leaving the Vertical one set to 0 px). Then select the right lower anchor point and using the same trick with the transform tool move it 1 px towards the left and then 3 more towards the top. Change the Blending Mode of the shadow to Multiply and the Opacity to 22%. Then create a duplicate making sure to reflect it Vertical (right click > Transform > Reflect > Vertical) and you’re done.
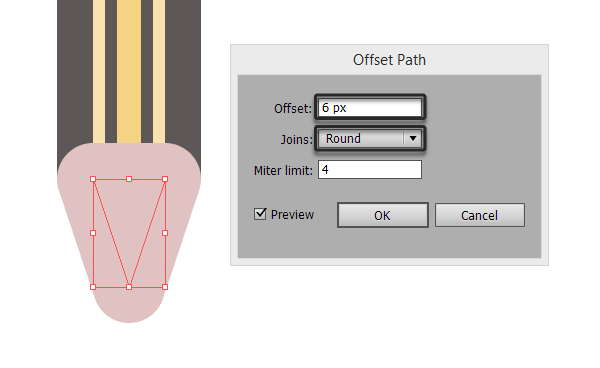
Step 11
Finish of the pencil’s tip by creating an outline and masking a part of the shadows. First select the tip, create a duplicate on top, and then go to Effect > Path > Offset Path and enter 6 px in the Offset field, changing the Joins from Mitter to Round. Expand the shape (select > Object > Expand Appearance), change its color to #5D5656 and then send the shape to the back of the pencil (right click > Arrange > Send to Back).
Step 12
Mask the tip by creating an 8 x 6 px rectangle using the same color as the pencil’s outline (#5D5656) and positioning it right under the intersection point of the two cross facing shadows.

Step 13
Add a finishing touch to the pencil by creating a 2 x 16 px rounded rectangle (#5D5656) with a Corner Radius of 1 px. Move 2 px towards the bottom and then create a 2 x 2 px circle. Group the two, and then position them towards the upper section of the pencil at about 56 px from the top.
Select all the elements of the pencil and group them together using ctrl + G.