Difficulty: Intermediate
Estimated Completion Time: 30 minutes
In this tutorial, we are going to create a simple Credit Card Form using HTML and CSS3. We’ll work with Google Fonts to use the custom font (Roboto) for this form. You are free to integrate this form into your website.
Let’s get started.
HTML
Let’s create our HTML structure.
We will create a form with the class “credit-form.” Then we will divide our form in two sections. The first section is the form header where will have our form title, and the second is the form body where will have all the form elements and buttons.
<form class="credit-card">
    <div class="form-header">
        <h4 class="title">Credit Card Details</h4>
    </div>
    <div class="form-body">

        <!-- Card Number -->
        <input type="text" placeholder="Card Number">

        <!-- Date Field -->
        <div class="date-field">
          <div class="month">
            <select name="Month">
              <option value="january">January</option>
              <option value="february">February</option>
              <option value="march">March</option>
              <option value="april">April</option>
              <option value="may">May</option>
              <option value="june">June</option>
              <option value="july">July</option>
              <option value="august">August</option>
              <option value="september">September</option>
              <option value="october">October</option>
              <option value="november">November</option>
              <option value="december">December</option>
            </select>
          </div>
          <div class="year">
            <select name="Year">
              <option value="2016">2016</option>
              <option value="2017">2017</option>
              <option value="2018">2018</option>
              <option value="2019">2019</option>
              <option value="2020">2020</option>
              <option value="2021">2021</option>
              <option value="2022">2022</option>
              <option value="2023">2023</option>
              <option value="2024">2024</option>
            </select>
          </div>
        </div>

        <!-- Card Verification Field -->
        <div class="card-verification">
            <div class="cvv-input">
                <input type="text" placeholder="CVV">
            </div>
            <div class="cvv-details">
                <p>3 or 4 digits usually found on the signature strip</p>
            </div>
        </div>

        <!-- Buttons -->
        <button type="submit" class="proceed-btn"><a href="#">Proceed</a>
        </button>
        <button type="submit" class="paypal-btn"><a href="#">Pay With</a>
        </button>
    </div>
</form>
CSS
Before we get started with the CSS, make sure to include our .css file and font in the head. We are going to use Roboto for this tutorial. You can download it from Google Fonts.
<link href='https://fonts.googleapis.com/css?family=Roboto:400,300,100' rel='stylesheet'>
<link rel="stylesheet" href="style.css">
First, add global/basic styling and make sure that the body has full height by adding the following lines:
/* Global */
* {
    box-sizing: border-box;
}

body,
html {
    height: 100%;
    min-height: 100%;
}

body {
    font-family: 'Roboto',
    sans-serif;
    margin: 0;
    background-color: #e7e7e7;
}
Great, now let’s style the card to make it 360×400.
We align it to the center of the page, add rounded corners and some shadows:
/* Credit Card */
.credit-card {
    width: 360px;
    height: 400px;
    margin: 60px auto 0;
    border: 1px solid #ddd;
    border-radius: 6px;
    background-color: #fff;
    box-shadow: 1px 2px 3px 0 rgba(0,0,0,.10);
}
We’ve set the left and right margins to auto, to horizontally center the element within its container.
Let’s add height and padding to our form-header and form-body:
.form-header {
    height: 60px;
    padding: 20px 30px 0;
    border-bottom: 1px solid #e1e8ee;
}

.form-body {
    height: 340px;
    padding: 30px 30px 20px;
}
This is how our card looks so far:

Our card has no structure, no color and no personality. We can change that with a little bit of code.
Add style to the title by giving it a color and setting the margins to 0.
/* Title */
.title {
    font-size: 18px;
    margin: 0;
    color: #5e6977;
}
We’re giving it a height of 42px, and adding basic styling to every element in our card, including buttons.
/* Common */
.card-number,
.cvv-input input,
.month select,
.year select {
    font-size: 14px;
    font-weight: 100;
    line-height: 14px;
}

.card-number,
.month select,
.year select {
    font-size: 14px;
    font-weight: 100;
    line-height: 14px;
}

.card-number,
.cvv-details,
.cvv-input input,
.month select,
.year select {
    opacity: .7;
    color: #86939e;
}
Style the form-body and the form elements within it. Start with the first input, which is the card number.
/* Card Number */
.card-number {
    width: 100%;
    margin-bottom: 20px;
    padding-left: 20px;
    border: 2px solid #e1e8ee;
    border-radius: 6px;
}
Then, let’s style our select elements, month and year. Float month to the left and year to the right and give them some basic styles.
/* Date Field */
.month select,
.year select {
    width: 145px;
    margin-bottom: 20px;
    padding-left: 20px;
    border: 2px solid #e1e8ee;
    border-radius: 6px;
    background: url('caret.png') no-repeat;
    background-position: 85% 50%;
    -moz-appearance: none;
    -webkit-appearance: none;
}

.month select {
    float: left;
}

.year select {
    float: right;
}
Now, we have to style our card verification field where we have the cvv-input and the cvv-details, which gives us details about the card verification code.
/* Card Verification Field */
.cvv-input input {
    float: left;
    width: 145px;
    padding-left: 20px;
    border: 2px solid #e1e8ee;
    border-radius: 6px;
    background: #fff;
}

.cvv-details {
    font-size: 12px;
    font-weight: 300;
    line-height: 16px;
    float: right;
    margin-bottom: 20px;
}

.cvv-details p {
    margin-top: 6px;
}
We’re done with the inputs.
This is how it looks:
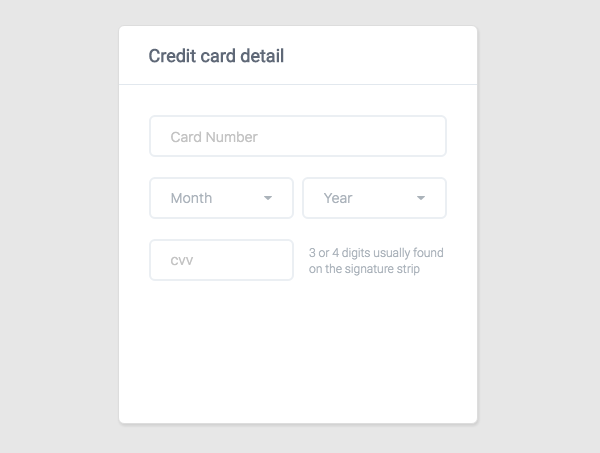
Pretty nice, right? But we’re not done yet.
We have one last thing to do — buttons. Let’s style them.
/* Buttons Section */
.paypal-btn,
.proceed-btn {
    cursor: pointer;
    font-size: 16px;
    width: 100%;
    border-color: transparent;
    border-radius: 6px;
}

.proceed-btn {
    margin-bottom: 10px;
    background: #7dc855;
}

.paypal-btn a,
.proceed-btn a {
    text-decoration: none;
}

.proceed-btn a {
    color: #fff;
}

.paypal-btn a {
    color: rgba(242, 242, 242, .7);
}

.paypal-btn {
    padding-right: 95px;
    background: url('paypal-logo.svg') no-repeat 65% 56% #009cde;
}
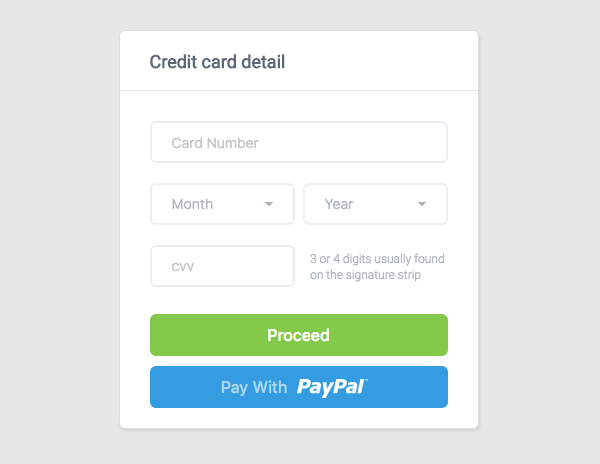
And this is our final version:

Isn’t this cool?
Conclusion
We’re done here. I hope you find this tutorial useful and you have learned something new from it. You can use this form for your next project or personal website.
Download the Credit Card HTML
If you have any questions or suggestions, please post in the comments.


3 Comments