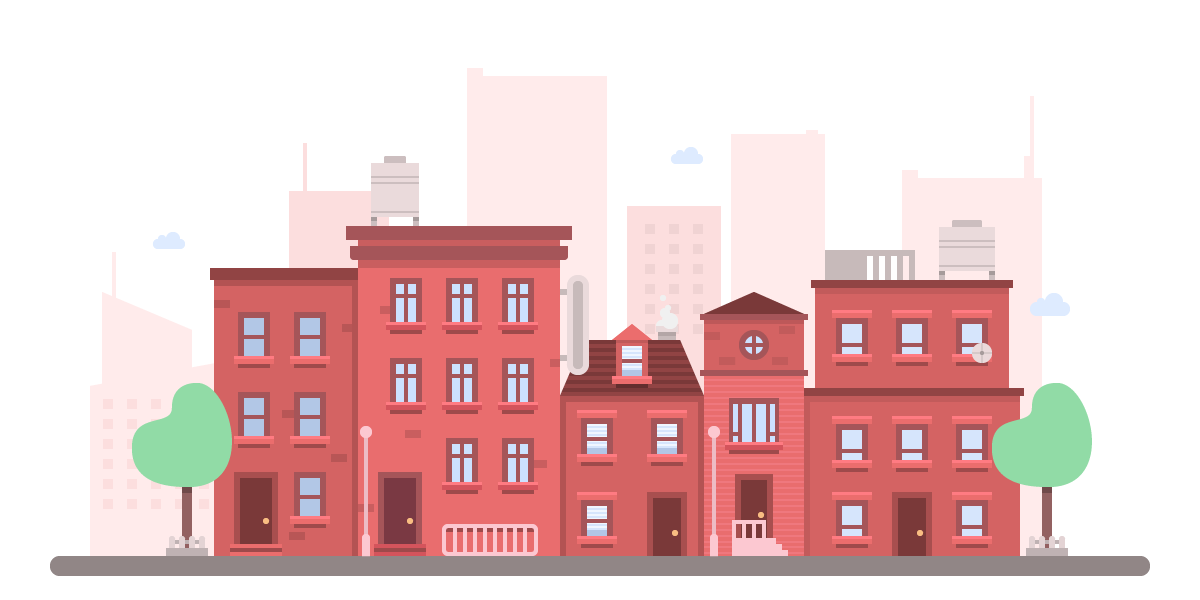
In today’s tutorial I’m going to show you step by step how to create a warm cityscape using some simple tools such as the Rectangle Tool and Pathfinder from Adobe Illustrator.
Step 1 – Setting up a New Document
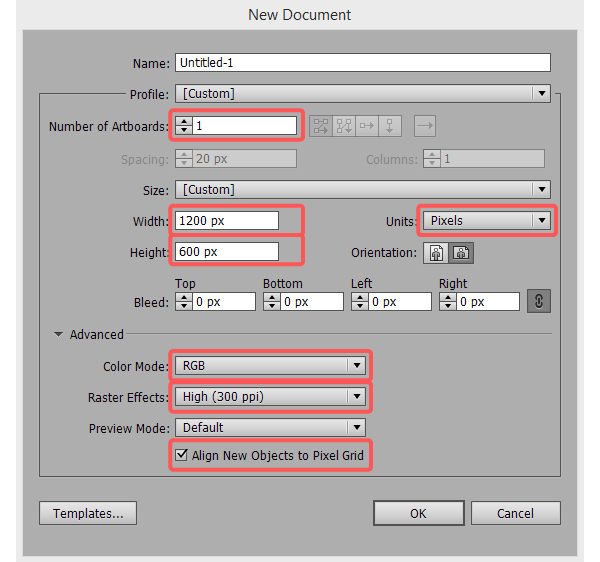
If you’ve read some of my previous tutorials you should by now know that the first thing I usually set up when starting a new illustration is the document itself. So, launch Illustrator and create a New Document with the following settings:
- Number of Artboards: 1
- Width: 1200px
- Height: 600px
- Units: Pixels
And from the Advanced tab:
- Color Mode: RGB
- Raster Effects: High (300ppi)
- Align New Objects to Pixel Grid:
Step 2 – Layering our design
Once we have our document set up properly, we need to create a bunch of layers (10 to be more precise) which will help us have a better overall control on our building process.
To do so, go to the Layers panel and set them up using the following names:
- sky scrappers
- boardwalk
- first house
- third house
- second house
- fourth house
- fifth house
- street lights
- trees
- clouds
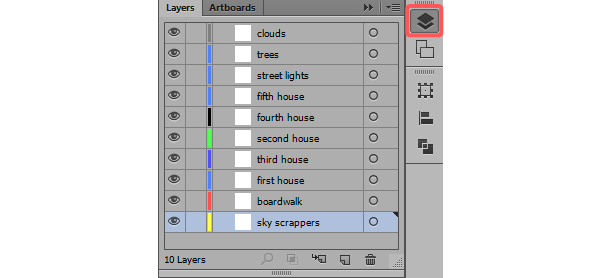
Quick tip: if you’re wondering why some of the positions of the layers are inversed from a logical numeric stand point, you shouldn’t worry, as we have some elements that go over some of the houses which force us to position those layers on top.
Step 3 – building the sky scrapers
Now that we have everything set, we will start building our way up through each layer, locking all the ones that are not used and focusing mainly on the one at hand.
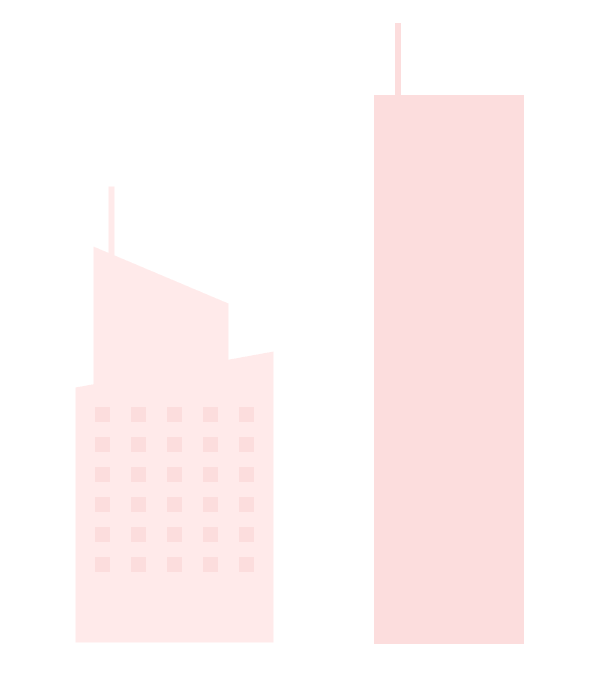
3.1. The first sky scraper
The first thing we will actually construct will be the background holding the sky scrapers.
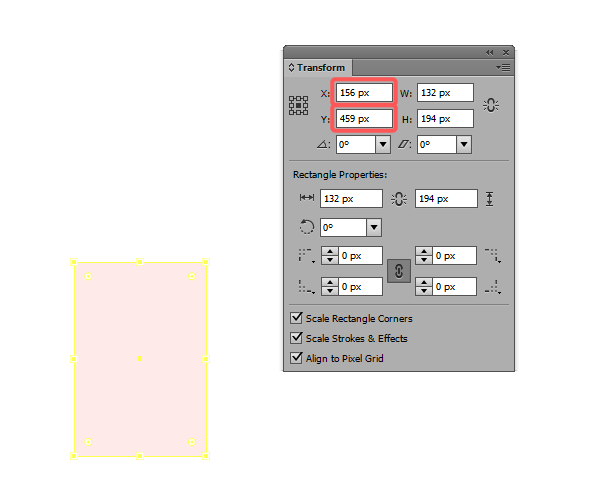
First make sure you’re on the proper layer (sky scrapers) and using the Rectangle Tool (M) create a pinkish (#FFEBEB) 132 x 194px shape, which we will position towards the left of our Artboard using the following coordinates in the Transform panel:
- X: 156px
- Y: 459px
Once you have the shape positioned, we need to adjust its left top anchor point, by nudging it down a couple of pixels. To do so, grab the Direct Selection Tool (A) select it, and then go to Object > Transform > Move.
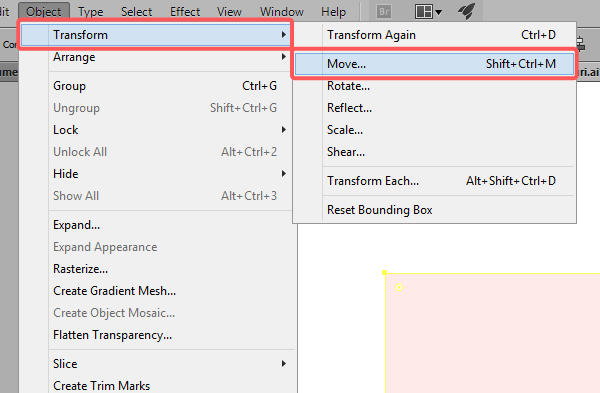
A quick pop up box should appear asking you to input values for either the Horizontal or Vertical position. We will type in 0 in the first field and 24 in the Vertical one.
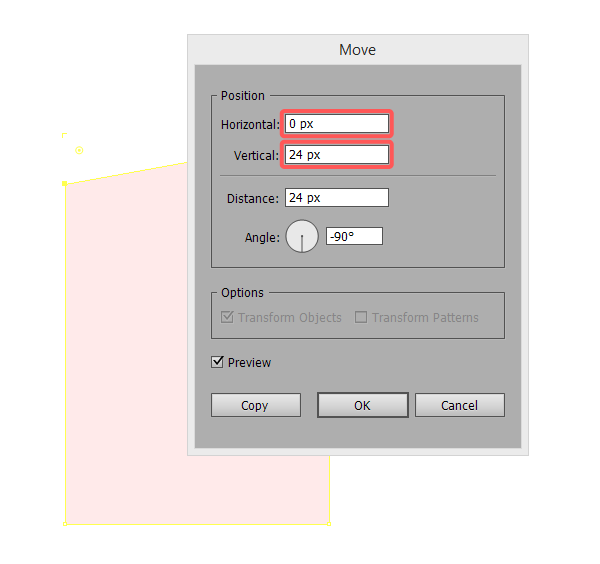
As you can see our left corner is now positioned slightly lower, which is exactly where we want it.
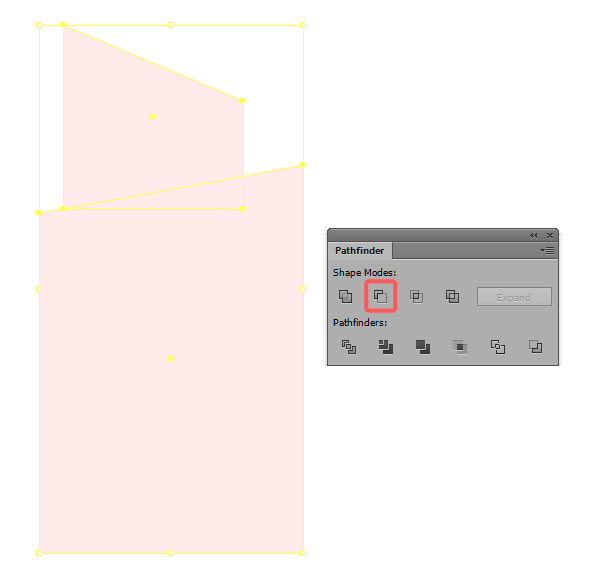
Create another 90 x 92px rectangle, position it (X: 147px, Y: 338px) and then using the same trick with the Move tool, lower its top right anchor point by about 38px.
With both of the created objects selected, use Pathfinder‘s Unite function to combine them into one shape.
Next, we want to add the top antenna, by creating a 4 x 48px rectangle, and positioning it using these coordinates:
- X: 114px
- Y: 276px
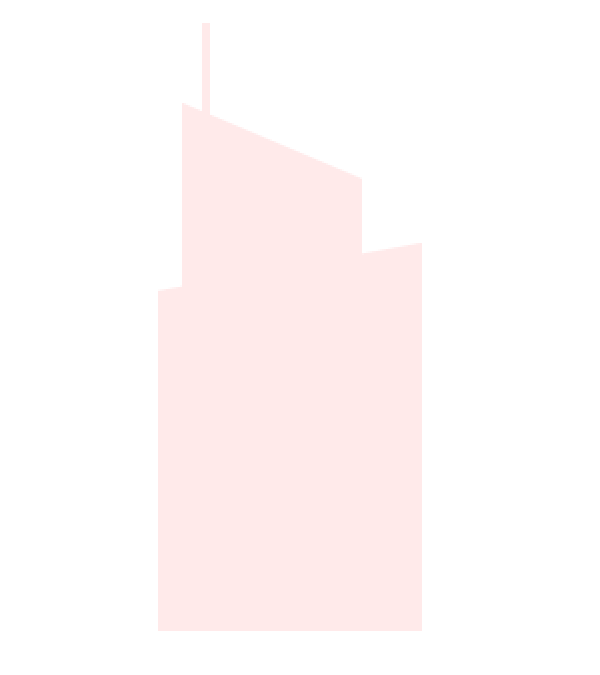
You can either group the antenna or unite it, depending on whether you want to leave it or not, so it’s all up to you.
To finish up our first sky scraper, we need to add some windows to it. Grab the Rectangle Tool (M) and create a 10 x 10px square (#FCDEDE), and position it as follows:
- X: 108px
- Y: 404px
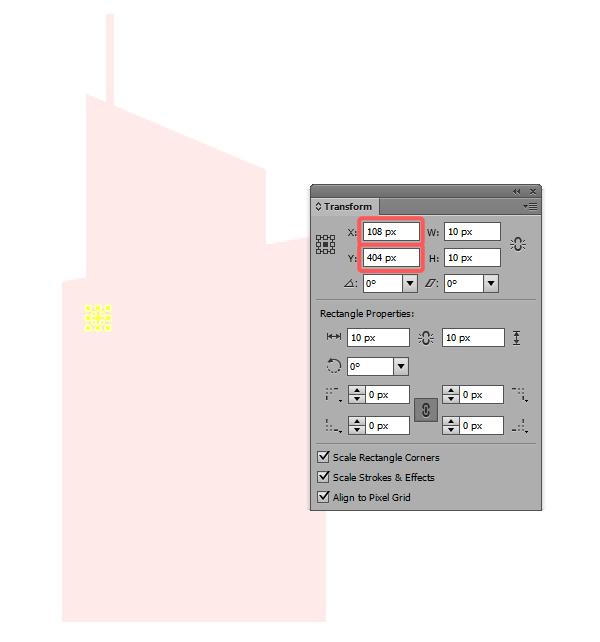
We now have our first window element, which we will duplicate four times so that we will end up with 5 objects which we will Vertically Align at about 14px from one another using the Align panel.
First create the duplicates by either selecting and then holding down Alt while dragging to the left (four times) or by using the copy (Ctrl + C) paste (Ctrl + F) method.
Once you have all five of them, select them, and then after clicking on the first element on the left to define it as the Key Object, use the Vertical Align Center and Horizontal Distribute Space as follows:
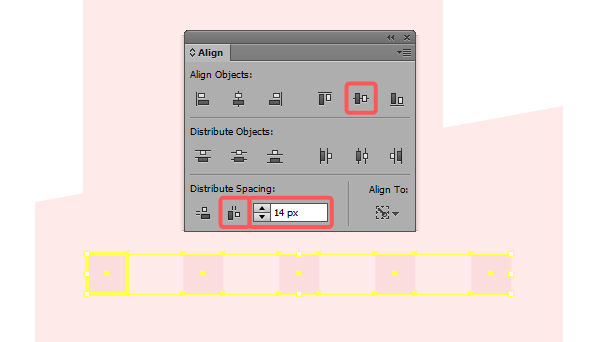
With all of the windows selected, press Ctrl + G to group them, and then five copies which we will position towards the bottom at about 10px from one another.
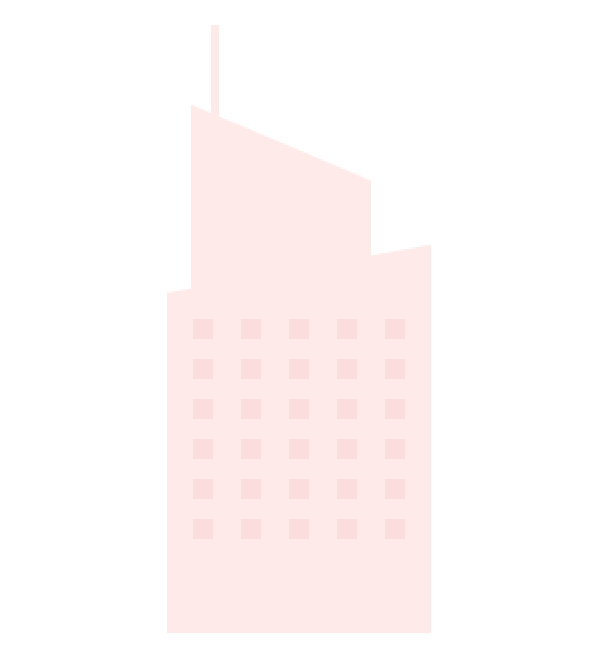
Once you have all your windows positioned as in the image above, select both them and the sky scraper and group them so that if you move it by accident its elements won’t get separated.
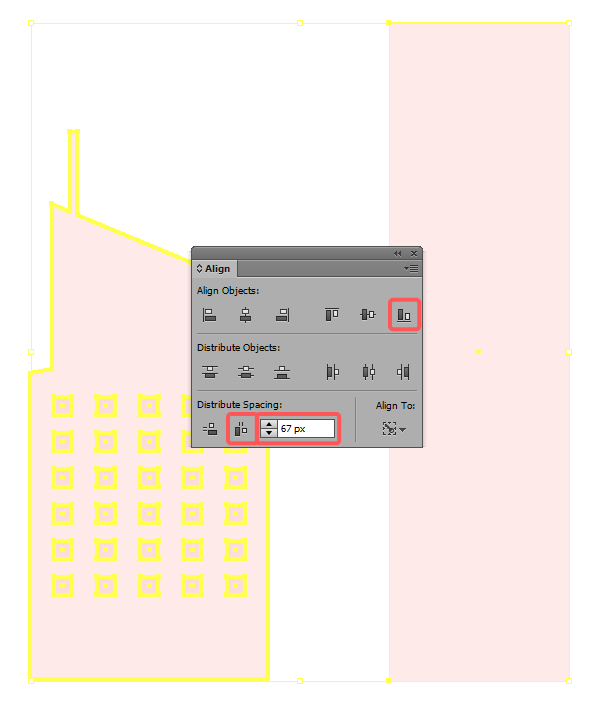
3.2. The second sky scraper
For the second sky scraper, we will create a darker (#FCDEDE) 100 x 366px rectangle, bottom align it at about 67px from the first building.
Add an antenna using the Rectangle Tool (M) and creating a 4 x 48px object, positioning it using these coordinates:
- X: 305px
- Y: 167px
3.3. The third sky scraper
For the third building, create a taller 140 x 480px rectangle, and position it at about 78px from the second scraper. Change its color to # FFEBEB, and then to add a smaller 16 x 8px section at the top left side.
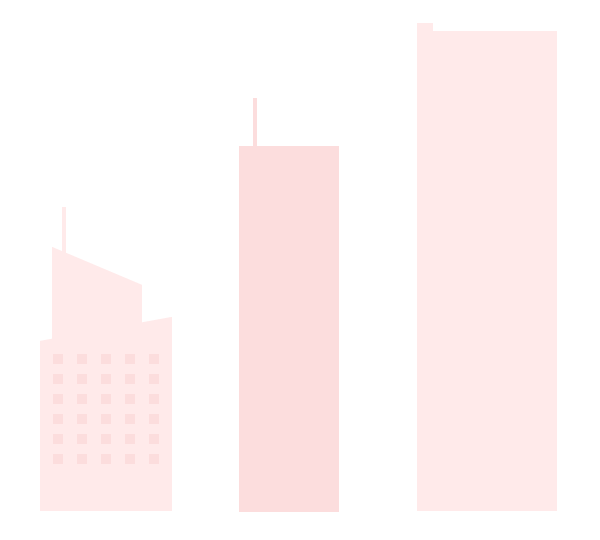
3.4. The fourth sky scraper
Again, with the use of the Rectangle Tool (M) draw a 94 x 350px shape, use the darker shade to color it (#FCDEDE) and then position it at 20px from the third building.

Add a couple of windows to the structure, by creating a 10 x 10 slightly darker (#F0D3D3) square, and positioning it using these coordinates:
- X: 650px
- Y: 229px
Then, duplicate it two times, and position the copies at 14px from the first one. Group all three windows, and create five duplicate rows positioned at about 10px from the first row.
Don’t forget to group all of the windows and the scraper using the Ctrl + G shortcut.
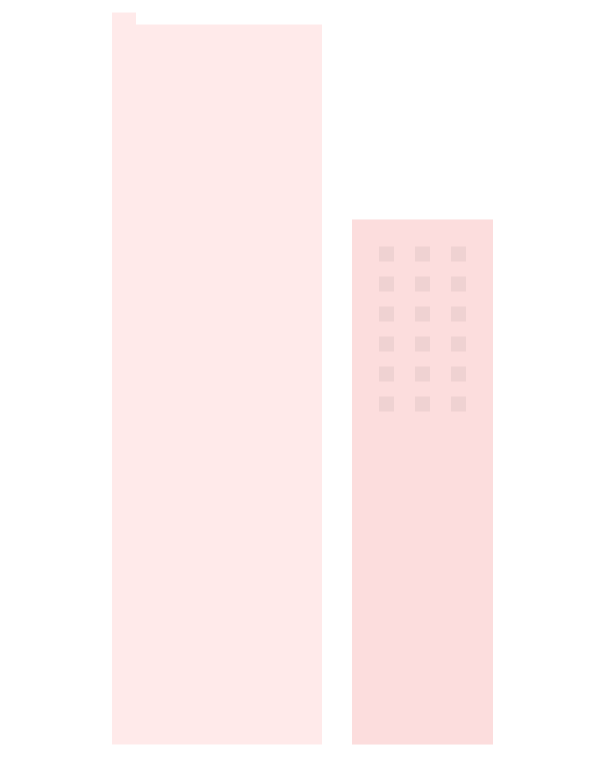
3.5. The fifth sky scraper
For the fifth building, create a 94 x 422px object, color it using the lighter shade of pink (#FFEBEB) and then position it at about 10px from the fourth scraper, making sure to bottom align them.
Add a smaller top section by creating a 12 x 4px rectangle and positioning it as follows:
- X: 812px
- Y: 132px
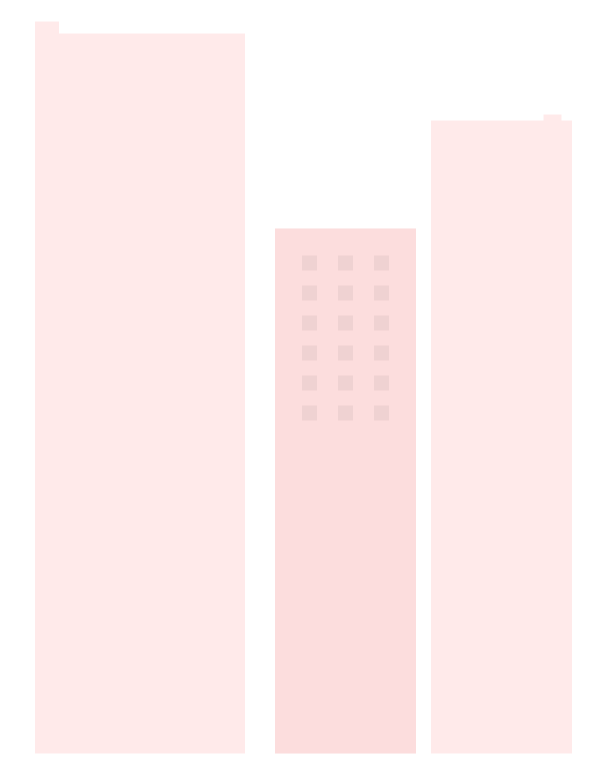
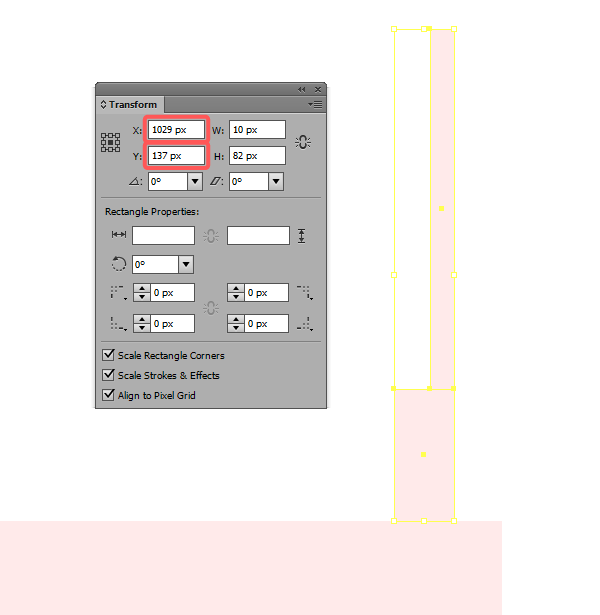
3.6. The sixth sky scraper
For the last scraper, draw a 140 x 378px rectangle, color it using # FFEBEB, and then distance it at about 77px from the fifth building. Add a top left section of 16 x 8px making sure to keep the same color as the building. Add an antenna by creating a bottom wider 10 x 22px section on top of which we will add another 4 x 60 taller section. Group the two and the position them using these coordinates:
- X: 1029px
- Y: 137px
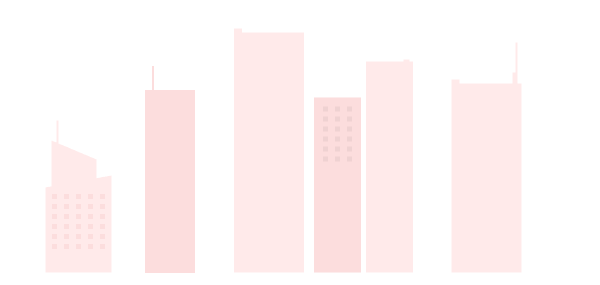
At this point your illustration should look something like this.
Once you have all the scrapers finished, it’s time to move on to the boardwalk layer.
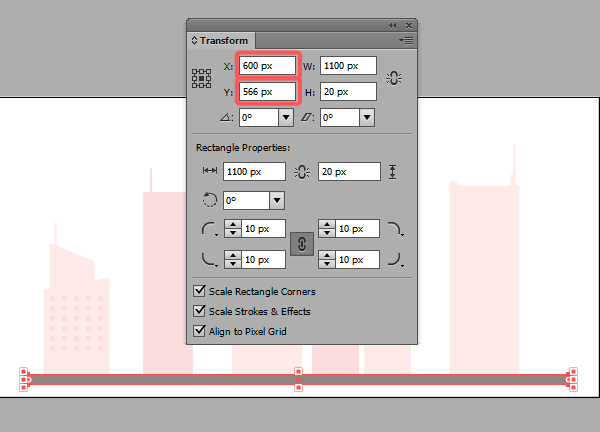
Step 4 – Adding our little boardwalk
This is probably the easiest step of the entire illustration process. Using the Rounded Rectangle Tool create a 1100 x 20px shape with a corner radius of 10px.
Next color it using # 918686 and position it at the bottom of the scrapers using the Transform panel.
- X: 600px
- Y: 566px


8 Comments